
R Markdown Quick Tutorial (Part I)
Overview
As a statistician or so-called data scientist, it is not only important to master the methods of data analysis, but also know how to pass the analysis results clearly to others and ensure our research reproducibility. Therefore, you might choose to create an R Markdown document to help you present your code alongside its output (graphs, tables, etc.) with conventional text. Here I am going to provide a quick tour of R Markdown and construct your own R markdown file within 10 minutes.
1. Get Started
First, to get R Markdown working in R Studio, you need to download rmarkdown and knitr package, which you can get from CRAN by running the following commands in R or R Studio:
install.packages(“rmarkdown”)
install.packages(“knitr”)
library(rmarkdown)
library(knitr)
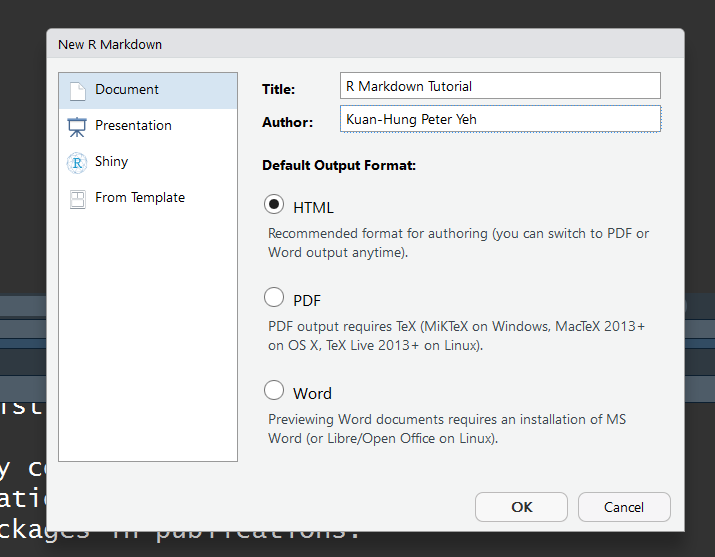
2. Open an R Markdown File
To create a new R Markdown file (.Rmd), select File -> New File -> R Markdown in R Studio. For now we will focus on a .html Document, which is highly recommended since it can easily converted to other file types like PDF or Word later.
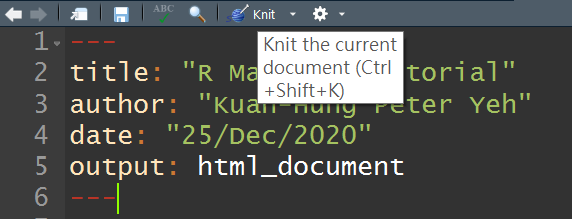
3. The YAML Header Format
After we created .Rmd file, the YAML header section enclosed by --- will appear at the top of script. It includes a title, author, date and the file type that you previous select.
—
title: “R Markdown Tutorial”
author: “Kuan-Hung Peter Yeh”
date: “ 25/Dec/2020 “
output: html_document
—
By default, those content will output by compiling it to .html if you press the Knit button in the taskbar. Moreover, newly created .Rmd file accompanies with basic instructions, if you would like to create your own script, just delete text below the YAML header section in the example file.
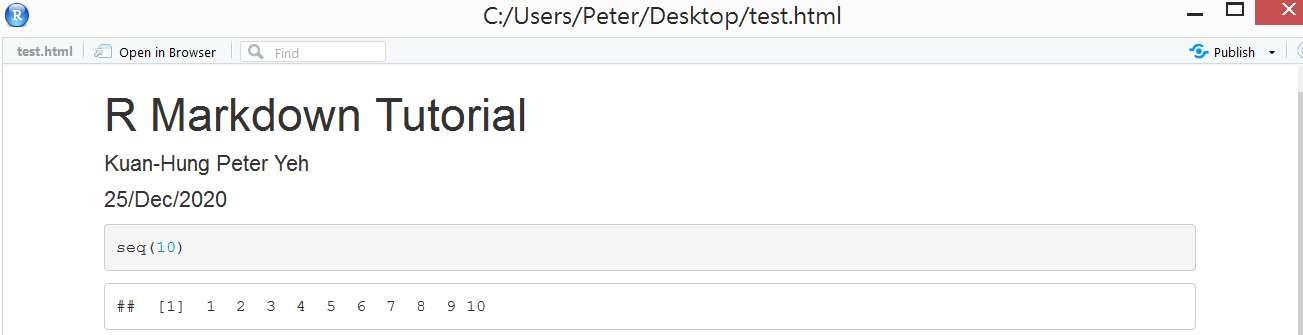
4. Code Chunks
Below the YAML header is the place where you will write your code with explanation and any outputs (graphs, tables, etc.). Before you write down your code, make sure that your code place in a Code Chunk. Therefore, you need to insert Code Chunk first, click Insert -> R in the taskbar or ** keyboard shortcut (Ctrl + Alt + I) **.
For example:
seq(10)
Next, you can run an individual chunk of code at any time by placing your cursor inside the code chunk and selecting Run -> Run Current Chunk or ** keyboard shortcut (Ctrl + Shift + Enter) **
Result:
5. More Code Chunk Options
There are sometimes unnecessary warnings, codes, and results you don’t want to show out in your final document. For example, when you load packages into RStudio, warning messages such as “Warning: package ‘survival’ was built under R version 3.4.0” might appear. Therefore, you can discard those results by inserting Instruction in the code chunk instructions. The table below are some commonly used instructions in R Markdown.
| Rule | Example | Function |
|---|---|---|
| echo | echo=TRUE | Is the code displayed alongside the results? |
| include | include=TRUE | Are the code and the results included in the output? |
| eval | eval=TRUE | Is the code run and the results included in the output? |
| warning | warning =TRUE | Are warning messages displayed? |
| error | error =TRUE | Are error messages displayed? |
| message | message =TRUE | Are messages displayed? |
For complete lists of knitr chunk options, Please visit the R Markdown Reference Guide.
Reference
Written in December 25, 2020